Quick Tips for Drawing Textured Fur on Drafting Film | Coloured Pencil Tips
Oct 14, 2022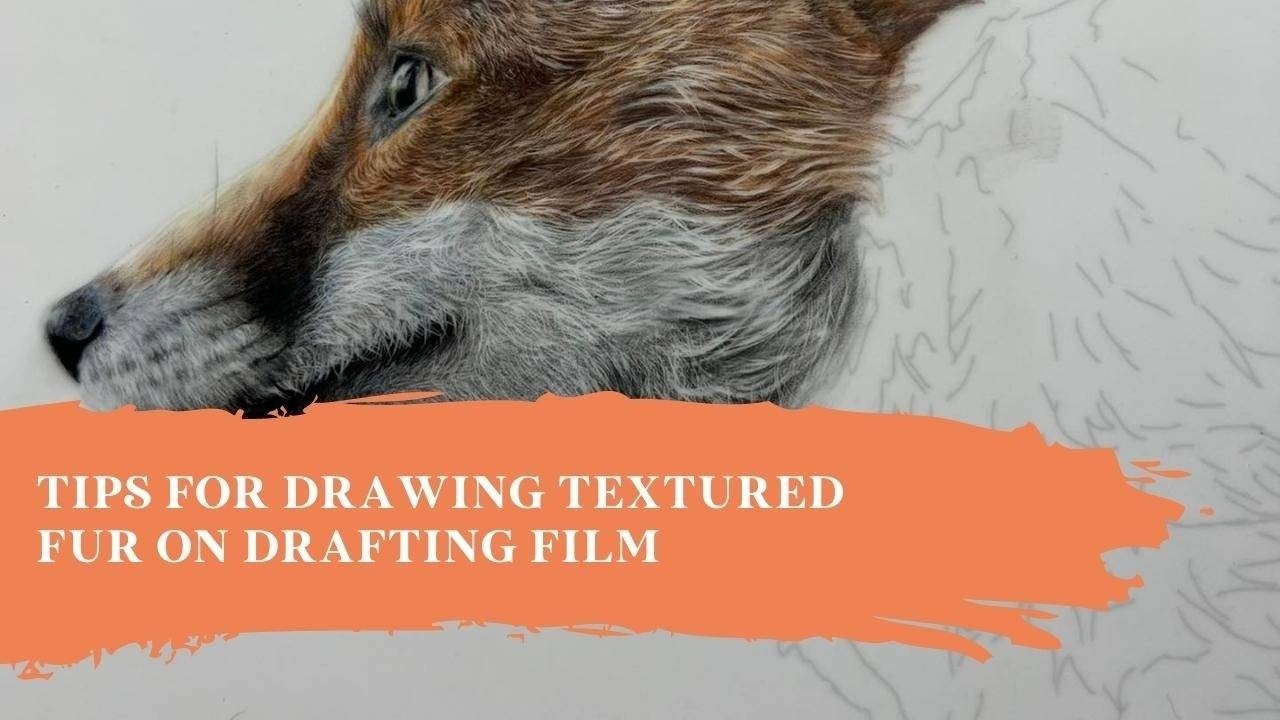
As you may know, Pastelmat is often my go-to surface for drawing realistic animals, so when I decided to draw a subject on Drafting Film for the first time in a while, the dramatic change in surface was a bit of a shock to the system! That’s why I wanted to share a couple of very quick tips for anyone looking to draw realistic textured fur in coloured pencil on Drafting Film, in hopes that it would make the process a little easier…
Get Your Darks in Early
Because Drafting Film is a very smooth surface with no tooth, you’re not able to add lots and lots of layers like you are on Pastelmat. This means you have to think very carefully about the layers that you do add.
I always begin by adding my darker colours first. By doing this, you could say that I’m setting the scene of the drawing. It gives me a chance to add not only colour but the structure of the subject into the portrait, whilst also allowing me to work out how light my highlights and mid-tones need to be.
My number one tip is to make sure that your dark colours really are dark. That way, when you come in with your eraser or Slice Tool, you’ll be able to see the impact and really add a sense of realistic, textured fur. Also, make sure you’re paying attention to the direction that the fur goes in. This is so important if you want to get the structure and feel of the subject right.
Bring in Your Details Quite Quickly
Again, as we’re working with a surface that doesn’t allow you to lay down many layers, you have to bring in your details quite early on. Once I’ve added my initial darker layers, I come in with my Tombow Mono eraser to remove some of that colour and add the softer sections of fur, before coming in over the top of that with my Slice Tool, which I use to add those really fine hairs into the drawing.
Using the subtraction technique is going to really help you add those all-important details to your piece and, by using two tools, like the Tombow and the Slice Tool, you’re able to add the varying textures, shapes and softness of the fur. The most important thing to do, however, is to make sure you’ve added enough depth to your drawing before going in with your Slice Tool. If you haven’t added enough pigment and you try to remove it with your Slice, the results are going to be a little disappointing!
To see me put these tips into practice in one of my own portraits, give the video at the top of this page a watch. I’ll show you how and when I added my darker layers to a drawing of a fox, as well as how I used the subtraction technique to add in those fine details and wispy hairs.
Ignite by Bonny Snowdon
...is the ultimate membership for those wanting to improve their Coloured Pencil Skills, increase their confidence and realise their dreams!
....................
Sign up below to join the Ignite Waitlist
Join our mailing list to receive the latest news and updates from our team.
Don't worry, your information will not be shared.
